Sunday, May 15, 2016

To Find / Locate IMEI Number

To Find / Locate IMEI Number Of Any Mobile

The actual IMEI number for the mobile phone acts as a unique identifier with the device. No two devices may have the same IMEI, which makes it a very useful tool for monitoring lost or stolen mobile phones. You can easily retrieve and report your phone's IMEI number in a number of different ways, determined by your device.
If you are registering your mobile phone, or trying to trade an old 1 online, you could possibly be asked for the IMEI number. If you're drawing a blank in addition to trying desperately to learn what this quantity is, don't be concerned. The IMEI (International Cell phone Station Equipment Identity) is really a unique number assigned to every cellphone sold via established channels. This number can be quite useful if an individual lose your mobile phone, or if it truly is stolen. Police usually require you to mention the IMEI quantity when reporting the phone as stolen and, then, depending upon the local laws, your phone could be blocked from being able to view networks or putting calls by blacklisting their IMEI.
Note: A good IMEI is of a SIM slot, so dual SIM phones may have two IMEI volumes. Similarly, tablets with calling connectivity feature will even have an IMEI quantity.
This makes the quantity important in crisis situations. And if the device is located, you can utilize IMEI number to establish it is indeed your mobile phone. This is finding your phone's IMEI quantity.

How to locate /Find IMEI Number Of Mobile Phones

USSD signal


  • This is the best method of finding your phone's IMEI quantity. The good thing relating to this method is it is more or fewer universal. It works on almost all feature phones in addition to smartphones, so try this before you head hunting for the actual phone's bill.
  • Dial *#06# on the phone.
  • The IMEI quantity will now be displayed around the screen. You should be aware it down a place safe or it is possible to always take a new screenshot.

On the product

If you offer an iPhone 5 or maybe newer iPhone, the IMEI can also be engraved on the back panel. Just flip the product to note this down. On iPhone 3gs 4s or old iPhones, the IMEI is printed around the SIM tray.

Check out Settings


  • On Operating system, go to Controls > About > IMEI to see the IMEI quantity. Tap Status and scroll because of see the IMEI info.
  • On an iPhone 3gs, tap Settings > Common > About and scroll because of IMEI.
  • On a lot of phones with a new removable battery, the IMEI is printed on a sticker that is into the phone, under the actual battery. Take the battery out to test.

Retail store box or expenses

The retail box along with the bill both contain the IMEI number written on them, which is reasonable to keep them safe as opposed to throwing them out there. Keep the box safe at the least, because it is going to be useful in order to check the IMEI, or if you opt to resell the phone afterwards. The IMEI number is going to be on the sticker on the side of the package.

Android


  • Android users could check their device's IMEI number even if they've lost the product. All the methods stated previously work perfectly and so are faster, but issues lost the phone instead of kept the package, this can nevertheless bail you out there.
  • Log in to be able to Google Dashboard using the Google account linked to the Android phone.
  • Click Android, next for the green robot brand.
  • This will reveal a listing of devices registered for the account, along making use of their IMEI numbers.

 Conclusion

This was about to locate /Find IMEI Number Of Any Phone , I am sure this article would've been helpful for users out generally there. If you have any type of question or confusion left relevant to this article , I shall make contact with your queries as soon as possible. Furthermore, if you might have found this guidebook helpful and worthy of reading then perform share it along with your other friends and others. Your shares can be proven helpful for most of the users out generally there. So, keep giving and liking each of our posts.

Saturday, May 14, 2016

Best & Use Full Earthquake Alerts App's

Best & Use Full Earthquake Alerts App For Android, iOS User’s
        Best and use full Earthquake Alerts App for Android, ios Natural disasters cannot come by alarming warning and everyone knows that. We need to avail all of the possible technological advantages around us to be aware from dynamics calamity like earthquake. Keeping the result of earthquakes within my mind let me list the best 5 Android apps which will aid you to get Earthquake Warns.
An Earthquake connected with 7. 5 degree struck in Nepal and East-North of Indian on 25th of April. This earthquake bring about huge destruction in terms of human lives, properties and marketplaces with Nepal. It is documented that over nine hundred people lost their lives in this particular natural calamity and several injured. However a beginning alert of Earthquake will let you in saving numerous lives. Here is one particular app which will alert you if you have an outbreak of Earthquake everywhere in the world right in your Smartphone.

The earthquake data a brand new retrieved from the USGS (United Expresses Geological Survey) internet site, which also actions significant earthquakes around the globe. There are numerous apps but the app named Earthquake Notify for Android telephones and Earthquake Guide and Alert regarding iOS users are two most in-demand apps which have millions of downloads available on its respected stores. This is able to see magnitude 1. 0+ through the US and degree 4. 5+ from across the globe.

These apps will let you know about such disasters beforehand which will could serve to be a first aid regarding yourselves. We realize that disasters are written in fate but because of such technological advancements you could save your circumstances from such serious effects.

So, don’t keep yourself on nature’s circumstances; you must accomplish some initial consequences to get on the protected side. The reason connected with sharing this app is about making you most guys safer. You may use one of the below and can begin receiving earthquake notifications if any kind of.

Best Android Apps for getting Earthquake Attacks
          Here you definitely will learn that “How for getting Earthquake attacks with Android phone?” These apps are really going to help you. I have listed only one of the most trusted and greatest apps, so you may choose one of the below one in line with your preferences.

The Apps Are:

Earthquake Warns Tracker
           The Earthquake Alerts Tracker allow you to track the earthquake occurrence around the world. It keeps on providing you notifications according for a set preferences. When you fixed certain settings with this app then you’ll become receiving notifications based on your settings.

It has really friendly and clear to see interface. You can choose temple by 3 Holo designs. You need to line the magnitude for ones alerts and with that basis you’ll become receiving the notifications. If you have to get this app for ones Android app then understand from Here.

Earthquake Just like
        The Earthquake Lite is one of the best app which allow you to to get notices of quake in real time. It is quite definitely prominent because of its awesome service. It will give you live USGS information, International data, thorough maps and thorough screenshots. You can effortlessly sort the information in terms of distance, location, degree and time. You can actually get this request from Google Perform Store. To get right to the download Click the link.

Earthquake Notify
           The Earthquake Notify another app which you may grab from receiving the earthquake notifications around you. You can acquire alerts of earthquake from worldwide. You need to line the magnitude after which it can easily commence receiving the alerts of the set country.
Furthermore, it gives you the latest quakes of the world. It gives that you map which allow you to check for the magnitude of quake. If you have to get this app for one’s phone too then Click the link to grab that.

Earthquake Notifier
           The Earthquake Notifier notifies you whenever any kind of quake take place on the planet. It gives you real-time notifications. This app enable you to custom filter your notifications in terms of time, distance and magnitude. It will give you the complete info of earthquake. Additionally, it let that you view the earthquakes that are fitted with taken place in last a day, 48 hours or one week. If you have to get this app subsequently here the link.

Latest Quakes
             The most recent Quakes is the past app in our list that could be used regarding receiving the earthquakes notifications or news. It let you receive the occurrence of quakes around the world. You can easily look at report of approximately 7 days old quake. You can filter the quakes simply by magnitude, date and distance.

Additionally, it will give you the complete details of earthquake including; interesting depth, time, location, distance and magnitude together with that it will give you shaking intensity. Furthermore, the alerts and notifications are anticipated in some days and that is the reason that I include added it with number 5. If you need to get this request then grab that from Here.

Here the link to download Earthquake Alerts App for ios.
Conclusion
I’m sure that these apps will let you to get earthquake problems on Android mobiles and iOS devices. I would emphasize that you share this list with all of your friends, dear ones and others. Given that, you may never realize that your share could be proven helpful for one of the up-coming victim. Therefore, do share it for the explanation for humanity and regarding saving precious existence.


Friday, May 13, 2016

Untold WhatsApp Tips And Tricks

12 Best And Untold WhatsApp Tips And Tricks
                        WhatsApp is going to be best mobile messaging app ever made for Android, iphone, Blackberry, Nokia & Java Mobiles. If you've active Internet connection with your mobile phone, then with the help of this app you can send unlimited communications, videos, audios, pictures to anyone. As you know that the WhatsApp’s popularity is continuing to grow so popular many whatsapp tricks and tips coming in the internet. It is predicted that WhatsApp has a lot more than 400 million active users all over the world. Due to it’s rapidly message delivery service and many other cool features namy citizens were attracted towards this. Here in this tutorial i am sharing the 12 Best And Untold Whatsapp Tips And Tricks  for any user who are applying Whatsapp app on their mobile phones or PC.
Use WhatsApp without your Mobile Phone Number
You can work with whatsapp without number which means not with your own individual number. So this trick may help you to do that easily and you'll activate whatsapp that has a number which is not your own and i.e. fake. Just follow the below steps and revel in.
  • If you already are using WhatsApp, uninstall it from the device completely. Download and do the installation again.
  • Lock your messaging service through changing the airline flight mode.
  • Now open WhatsApp in addition to add your number to it. So it are not able to deliver the message towards server it will request you to choose an alternative strategy to verify.
  • Choose the authenticate through message option and fill up your email address and Click on ‘Send’ selection and without waiting simply click ‘Cancel’. This ends the authorization practice.
  • Now, you are required to forge messages. Install the message Spoof text for Android in addition to Fake- a- Information for iPhone.
  • Spoofing approach: Go to one’s Outbox -> Copy the message information to spooler app -> Send this to spoofed proof.
  • Use the pursuing details.
  • To: +447900347295
  • Coming from: + [Country code][mobile number]
  • Information: Your email target.
  • A message is going to be sent through that will spoofed number. You should use this number for connecting with your close friends.

Hide “Last Seen” Timestamp
          Automatically, WhatsApp shows the “last seen” timestamp, telling other users the last time you were on WhatsApp. It’s a great feature, but the function becomes really annoying given it reveals whether that you are online or definitely not. You cannot hide from the friends and they’ll keep actually talking to you. So if you want to hide this” last seen in the” time stamps follow the under mentioned steps.
  • Earlier there are several third party Applications for sale in Google Play store to cover ‘last seen’ feature. By the latest update, you are able to use this feature without installing another apps. 
  • Download the latest version of WhatsApp on the official website have fun with this feature.
  • To hide last seen feature, Open WhatsApp, Head to Settings > Accounts > Privacy > Previous Seen.
  • There you can select three possibilities, Everyone, My contact lenses, Nobody. Select any one of them.

Spy and Investigate Conversation of One’s Friend
          Is it feasible to Spy straight into Whatsapp conversation in your close friends and read their conversation? Yes, it will be possible and I’ll explain you relating to this awesome trick through which you'll spy your close friend’s conversation. Just comply with the below stated steps.
  • Firstly, you want to do is, go to the Micro SD card and then go through the Whatsapp and down the road on the Repository option.
  • Immediately after that you are done with step one you’ll get two files including, msgstore-yyyy... Dd...Db. crypt
  • msgstore. Db. Crypt
  • After finding these files, you must do is take these files from the friends mobile and then you can be easily able you just read their conversations they have done with their friends. You can open them employing a simple text publisher.

Backup And Regain WhatsApp Chats
          WhatsApp makes automatic backups of the chats, but it's also possible to make a handbook backup. Follow these simple steps to restore ones whatsapp chats.
  • In iOS, Go to be able to Settings > Speak Settings > Speak Backup, then just click Backup Now.
  • In Android, just go straight into Settings > Speak settings and faucet Backup conversations to generate a backup.
  • It will not likely backup your media, so you will have to use a record manager to burn the media files in /sdcard/WhatsApp/Media with your mobile.
  • There’s ugh to restore talks directly from WhatsApp, so if you want to restore a burn just uninstall in addition to reinstall WhatsApp.
  • Whilst you begin WhatsApp right after the reinstalling ones app, you ought to be prompted to restore your newest backup.

Send files of other Extension cords like Zip, Rar and PDF

    We all are aware that WhatsApp doesn’t help to send different files than sound and video platforms. There is no actual option to reveal documents, compressed files, and other files using WhatsApp. But having an additional app just like Cloud Send you can send PDFs, APKs, Word documents plus much more using WhatsApp.
    Also you can use third get together app like What’s Crammed 2 ads to be able to send any files of any dimensions via WhatsApp. But ensure that both the sender and receiver have to have What’s Packed 3 ads application installed on their smartphone.

Disable WhatsApp Car Image Download
          Automatically WhatsApp download all images, videos and voice notes for a memory which will create large amount of mess in one’s gallery. Sometimes this may well kill your portable data and battery life once you have a very small data balance with your mobile. So this trick is going to be helpful to cease auto download associated with images or movie.

Settings > Speak Settings > Mass media Auto Download. Select a solution from all three which befits you. If you desire to completely disable automobile download, make all options to No Media.

Hide ones WhatsApp Profile Picture (DP)
            On account of privacy concerns, or everything else, if you desire to hide your profile picture this trick will certainly help you. Hiding Profile Picture option is available for the latest version of WhatsApp. Should you be not using newest version then obtain it and after installing visit Settings > Accounts privacy. Then simply click Profile Photo, select from any of the three options based on your needs – Everyone, My contacts, Not anyone.

Change Your Friend’s Profile Picture
You can change your friend’s profile pic into your WhatsApp by using this new and an incredible trick to prank your pals. Follow the below mentioned easy ways to do this.
  • Choose a profile picture for your friend. Use Google Image look for cute looking monkeys in addition to donkeys or creepy looking people.
  • Resize the picture to 561×561 pixels employing Paint or Photoshop in addition to name it with all your friend’s mobile telephone number.
  • Save the image towards SD >> greeting card WhatsApp >> Page Pictures. Overwrite the current file (if necessary).
  • Disable Wi-Fi and data network. If you don’t WhatsApp will automatically update the picture.
  • Now, people show your buddy the pic ones profile WhatsApp instant panic invite the woman's face.

    Note: This may not be a hack, but simply a trick to change your friend’s profile picture only with your device. This means for fun goal only.

Create A Fake / Speak Conversation
        This trick goes viral these days and lots of people are generating funny fake interactions and posting the screenshots over social media marketing like Facebook in addition to Google Plus. By using the app like WhatSaid-Whatsapp Prank you can actually create fake interactions and play pranks with your friends.
You can create fake interactions with anyone by having your photos, name it and create your own personal posts (with both sides). Don’t work with it to spoil someone’s existence please.

Hide Two Images In one
Do you desire to send an image for a WhatsApp friend that will first look such as a beautiful one yet when he/she simply click it, the image will change to another one? Then just comply with below steps…
    Down load & Install Magiapp with regard to android and in addition to FhumbApp on iPhone.
    Now after adding this wonderful app just fire this up and then you will observe interface something lie inside the image on the correct.
    Now just go through the True Image selection and choose ones original image and then go through the Fake Image selection and choose ones prank image.
    Currently after selecting ones images just press Do Magic! Selection and voila! It’s done now just share your picture with everyone.

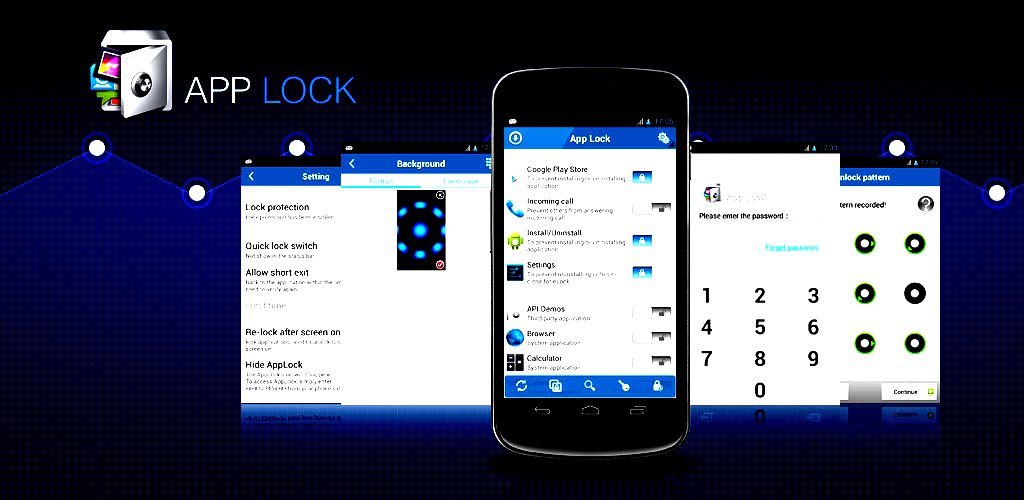
Secure /Lock Your WhatsApp
           Everybody, at some position or another, has probably had to manage friends or family going for a sneak peek with their WhatsApp announcements. Thankfully, if you’re employing WhatsApp on Android os or BlackBerry, there are apps that will help secure your WhatsApp coming from prying eyes.
  • In the event you’re using Android os, there’s WhatsApp Secure, while BlackBerry users may wish to check out Secure for WhatsApp.
  • Basically, both of these types of apps work in the same way: when you have tried them, WhatsApp will be protected by way of PIN (in the truth of WhatsLock) or a password (in the truth of Lock pertaining to WhatsApp). Either technique, once you have things build, the people about you shouldn’t be capable of take a sneak peek for your WhatsApp any extended.

Create Shortcuts With regard to Important Contacts
  • Would like to speed up your current WhatsApp communication? Why not consider creating a shortcut for your favorite Whatsapp get in touch with or group straight from a home screen?
  • On Android os, this is as simple if pressing on the group or contact you would like to create a shortcut pertaining to. When the menu appears, just tap on Add conversation shortcut. This will make a shortcut to the contact or group you have chosen right on your current home screen.
  • This behavior isn’t available on WhatsApp for iOS, but you may use a third-party app such as 1TapWA to have got similar functionality on the iPhone. Since it’s an app, 1TapWA also offers some extra features such as an image manager and a steps scheduler.

Conclusion:
This was each of our guide for 12 Best and Untold WhatsApp Tips and Tricks. I am sure this article would've been proven helpful for most of the users out generally there. If you have any type of question or confusion left relevant to this article then do ok, I’ll know. I shall make contact with your queries as soon as possible. Furthermore, if you might have found this guidebook helpful and worthy of reading then perform share it along with your other friends and others. Your shares can be proven helpful for most of the users out generally there. So, keep giving and liking each of our posts.


Thursday, May 12, 2016

Create Apple ID without Using Credit Card

Way To Create Apple ID without Using Credit Card
               Possessing an Apple ID is a prerequisite to do almost everything related to Apple company services. If you intend to buy music upon iTunes, download apps within the App Store, or even use iCloud, you'll want an Apple ID.
A few in years past, linking a charge card to an Apple company account was mandatory. But Apple has changed its stance and contains been letting people create an Apple ID without a credit card for a whilst now.

Whatever your cause might be to do this, we are likely to show you the best way to create an Apple ID without a credit card.

Note: should you don’t link a card or other payment method to your Apple ID, you will obviously not be capable of complete purchases, but you will however be capable of download free articles, such as cost-free apps.

The most searched and asked query is around creating Apple ID without making use of or linking credit card. So, I have searched the solution this for you guys and today you will learn that, How to generate Apple ID without making use of Credit Card?  There's a chance you're wild to be familiar with it for positive.

The Apple ID permit you to to avail all of the features and specs of this iOS device. Thus, it has become very necessary for iOS users to obtain this ID for their device too. Nevertheless, due to your unavailability of credit cards most of the users couldn’t create ID for their selves. Therefore, we are giving this guide for you and you might use it to generate Apple ID without aid from Credit Card.

Learn-How to Create Apple ID without Credit card

So, here are your steps which are supposed to be followed in order to create Apple ID. We know that you want the method and steps quickly and so without taking your time more, I would request you to go through the below steps for the solution.

  1. First coming from all, Open iTunes on your desktop, if you usually are signed in along with your Old Apple ID then sign out there first.
  2. After that will, scroll down and choose the country with which you intend to create your Apple Company ID.
  3. Now, you need to open any software in App store from iTunes after which it will prompt a communication to enter your current Apple ID and Password. You must click on Produce Apple ID option.
  4. Afterwards, you are purported to follow the instructions with the first page after which it proceed to Payments screen and you need to select none from Credit card options list.
  5. Now, enter any dummy address to try and do verification.
  6. Then you can begin using your Apple company ID which you've just created which too without using a card.

Conclusion

This was each of our guide for creating Apple ID without credit card. I am sure this article would've been proven helpful for most of the users out generally there. If you have any type of question or confusion left relevant to this article then do ok, I’ll know. I shall make contact with your queries as soon as possible. Furthermore, if you might have found this guidebook helpful and worthy of reading then perform share it along with your other friends and others. Your shares can be proven helpful for most of the users out generally there. So, keep giving and liking each of our posts.


Get AdSense Account Quickly

The Ways To Get AdSense Account Quickly With Host Partners (YouTube + Blogger) 

 Hello Everyone! You ever want an AdSense account??
Then this article may be going to Help You to get your own AdSense quickly.

You All know about Google's Famous revenue making site called "AdSense and many of you have tried to get approval from them for your website, but unfortunately you didn't approved due to many issues like "copyright content, minimum age, Doesn't meet to google policy Etc.
Brief: You can create AdSense account less than 2 hours (AdSense in Blogger + YouTube)
Sign Up for AdSense through a host partner (BlogSpot, YouTube) is quite easy they'll never reject your request if you are looking for show ads in your BlogSpot website.

Steps For Apply Adsense Account:
  1. (Optional) First, create a new Google account and set your location to UK or USA
  2. IMPORTANT, you have to be over 18 (Set your age +18 or you can write your father name in Payee field)
  3. Once you have created this account, go to YouTube and login with your new Google Account. Also upload any video by creating YouTube channel
  4. Now go to this url : http://www.youtube.com/account_monetization and click "Enable Monetization"
  5. Now go to this url : http://www.youtube.com/account_monetization?action_adsense_connection=1
  6. And if you want check the status of your AdSense account go to this url : https://www.youtube.com/account_monetization?feature=flow&action_status=1
  7. Follow the instructions given at this stage you can enter your real country.
  8. Await Confirmation
After you get the email Like Your Account Has Been Enabled:

If you want to use this with your blogger account, do this afterwards:

1. Go to Blogger.com
2. Click the Blog you want ads on.
3. Click Earnings - Google will ask you for use your current google account click "Yes use This account Update - After clicking use "My current Google account you'll get AdSense in blogger website instant
4. Click "Get Started"
5. Click "Link account"

If you’d like to show ads on your own non-host partner website, then you’ll need to provide the URL of the site you want to monetize. You can do this via a one-time application form. Here’s how:
  • On the Home tab, visit the Account settings page.
  • In the "Access and authorization" section, next to "Only host sites are allowed to show ads for your account," click edit.
  • On the “Show ads on other websites” page that appears, enter the URL of the site where you plan to show ads.
  • Click Submit.
  • Finally you need to implement AdSense ad code on the URL that you provided above, on a page that receives traffic.

Tip: Make "About Us, Contact Us, Terms in your website in only case if you want link your website hosted by any other hosting provider (Non-BlogSpot site)

And if you want to use AdSense just in your blogger site the above step it not for you.

Now you’re done.
 Add your link & Enjoy

I hope you are going to Apply for AdSense for your blogs or YouTube this article may help you. So, Don’t Forget to Share Your Experiences with us after you applied for AdSense.

          If this article use for you  then share with your friends and others  J

Install Android Kitkat (Version 4.4 )

 Way To Install Android Kitkat In Your Smartphone
           Andoid kitkat accompany additional added new options. It finally free within the market and is offered for you to launch it in your sensible smart phone. Does one got to purchase a replacement phone for it? Not so really!
And If you own Google Nexus four or Nexus seven then there’s an honest news for you that you are simply presently progressing to have the official golem Kit-Kat 4.4 update for your Device.

Android Kitkat - New Features

1. Improved Google Now
You can now activate Google Now by simply saying "OK Google". It’s only available to Nexus 5 for now though. The contextual cards feature also gets an upgrade. Google Now cards will try to predict information you need based on your location, favorite sites or TV programs.

2. Better Memory Management
KitKat is designed to run on devices with as little as 512MB of RAM. Google has implemented behind-the-scenes improvements to Android 4.4′s memory management, and will be providing developers and OEM manufacturers with tools and options to take advantage of these improvements. These memory improvements are expected to lead to smoother multi-tasking as well.

3. Smarter Caller ID
Android’s default phone app is also getting some welcome changes, including a fresh new design. The dialer now has a search field that you can use to search for a business’s contact info listed in Google Maps. This will pull up contact info for businesses near your area.

4. Immersive Mode
Let’s face it; Android’s status bar and navigation buttons can sometimes get in the way, especially when you’re playing a game, reading eBooks or watching videos. Fortunately, Android 4.4 comes with a new immersive mode that hides everything except the app you’re using. Once you’re done, just swipe the edge of the screen to bring back your status bar and navigation buttons.

5. Hangouts App Upgraded
The old Android messaging app is now a thing of the past with KitKat. Instead, Google Hangouts now supports SMS and MMS, so all your messages will be in the same app. Hangouts will also be getting support for HD video calls across all devices.

* And Much More....

I share the new kitkat features and new android updates in my next post J

Here steps to install Android Kitkat Version 4.4

  1. First You need to download the Android Kitkat 4.4
  2. Make sure your Device is already having Android OS 4.1 Jelly bean or above.
  3. Extract the download file using WinRAR/WinZip.
  4. Once you extract the download files.You can find the 3 apk files (Prebuilt Gms Core.apk, Velvet.apk, GoogleHome.apk)
  5. Now copy/move all. Apk files to your phone memory.
  6. After that , Install these APK files on your smartohone.

Note : Install PrebuiltGmsCore.apk then Velvet.apk and at last GoogleHome.apk

I hope you are going to update your old version smart phones into new versions. So, Don’t Forget To Share Your Experiences with us after updating your smart phone J


Sunday, May 8, 2016

Use 2 Whatsapp Accounts On Android Mobile Without Any Rooting


Use 2 Whatsapp Accounts On Android Mobile Without Any Rooting
            Trick for your Android mobile phone. Now, it is easily possible to use 2 whatsapp on android mobile phones. Interesting thing is, this method will work without root also. Though, this trick can work in single sim too, try it out 😉


How to Use 2 Whatsapp Acounts On Android

First of all, let me clarify that, this trick might not work for few of the Android mobile. I have tried in different Android devices and I could use 2 whatsapp on all of them without any problem.

few simple steps to achieve our target and start using two whatsapp account on one mobile.

1. Goto Settings

2. In that select User settings

Remember, we are going to use 2 whatsapp account on single android mobile phone that too without rooting our mobile device, and to achieve this we are creating a separate user environment on your android device.

3. Add New User on your Android mobile

Well, this is a trick many doesn’t know. With your latest Android Lollipop Operating system, you can have an option to add, delete, modify an user for your android device same like computers.

4. Configure new user to enable 2 whatsapp account on android mobile

now simply click next buttons to configure your new user for basic setup and once it is done you are almost ready to go to use 2 whatsapp accounts on your android mobile.
5. Congratulations, you are all done to use 2 whatsapp on your android mobile

Now, you have 2 user accounts. You can switch from primary to new user and install Whatsapp. Once you istall you will receive an SMS verification. Since you have dual sim mobile, you will immediately get verified without any hassle. Once verification is done, you can switch between both users and use 2 whatsapp accounts on your android mobile.

              THANKS FOR READING THIS TRICK AND FOR VISITING MY BLOG


Wednesday, May 4, 2016

Whatsapp Messenger on PC, Computer or Laptop

How to Use Whatsapp Messenger on PC
       These days Whatsapp has taken over all the messengers available in the market and because of simplicity and easy to use features, whatsapp is most popular messenger amongst all available chat applications over internet. But Whatsapp can be used only through smartphone, but lots of us are facing below problems before using Whatsapp application.

  • §Don’t have Smartphone?
  • §  Don’t have Wifi internet connection or Data-package in phone?
  • §  Don’t like to chat from Mobile because of slow Typing Speed?
  • §  Mobile hang because of heavy data and hundreds of Chat messages in Whatsapp?


Friends, Now I will teach you how to Use Whatsapp Messenger free on PC or Computer or Laptop, even if you don’t have a smartphone.

How to Use Whatsapp on Computer or Laptop

Install Whatsapp on your PC using Bluestack

  • §    Free Download and Install Bluestack Android Imulator
  • §  On Bluestack home page, click Search icon on top right corner
  • §  Find Whatsapp from the search application list
  • §  Click Install button
  • §  Once Whatsapp Messenger Installed, Start the application in Bluestack
  • §  Enter your mobile number when prompted
  • §  Whatsapp will try to verify Mobile inside Bluestack but it will fail, don’t panic as it will ask      you to verify
  • §  Verify your Mobile number by entering 6 digit verification code
  • §   Once verification is done, you are ready to use Whatsapp messenger on your computer or laptop

Some Facts of using bluestack to run Whatsapp on PC :

  • §  Works on Windows XP, Windows Vista, Windows 7 and 8 as well as Mac systems.
  • §  Bluestack needs powerful computer with higher RAM and possibly dedicated graphic Card to     run apps smoothly
  • §  Almost all android and mac  applications available on bluestack


“I Hope you guys understand this tutorial how to use whatsapp on computer or laptop”

Tuesday, May 3, 2016

Hidden Windows Tricks

Top & Best Hidden Windows Tricks  
             Recently Microsoft has launched their new OS, Windows 10 by making the customers to wait eagerly.Windows 10 got some bugs along with lots of hidden features with it! This one has changed the total interface of operating system and loaded with fully unique features. Anyhow some folks don’t have much idea about Windows 10 hidden tricks 2015. So I’ve planned to share this info with this article! Hope you will enjoy it.


Here’s some Windows 10 Hidden Features and additional entries.

Top & Best Hidden Windows Tricks

1. How to Change the taskbar color in Windows 10?
  •   Jump to your desktop and right click to open the option Personalize.
  •  Then click the Colors and choose your desired color. These changes will be made on both Start Menu and on Taskbar. If you want you can go with automatic option “Automatically Pick an accent Color” which will set you a matching color for your desktop and make your desktop looks awesome.

2. How to Add folders to the Start Menu in Win 10?
  •          Just Right-click the desktop and Select Personalize.
  •        Then click the Start and select “Choose which folders appear on Start.

3. How to Remove tiles from Start Menu in Windows 10?
  •          Click the Start button and right click on the tile you want to remove.
  •          Then choose ‘Unpin from Start’ found down below to remove the tiles from Start Menu.

4. Tweak on Start Screen in Windows 10
  •          Again Right-click the desktop and choose Personalize.
  •          Then Select Start to Turn on ‘Use Start full screen’.

5. How to change the Notification Settings
  •          Click the Start button and navigate to Settings.
  •          Then click the System and select ‘Notifications & actions’.
  •          Now just pick your desired settings to get as notifications.

6. How to Turn on Inactive Page Scrolling?
  •          Go to Settings and click Devices.
  •         Then select ‘Mouse & Touchpad’.
  •          Then just check the ‘Scroll in-active windows when I hover over them’.

7. How to Turn on “Hey Cortana” in Win 10?
  •          Select the Notebook option and go to Settings.
  •          Now just turn on ‘Hey Cortana’.

8. How to Create God-Mode in Windows 10?
  •          Create a new Folder on your Desktop.
  •          Then rename that folder to  “GodMode.{ED7BA470-8E54-465E-825C-99712043E01C}”
  •          Now you should have seen an icon labeled as God Mode 😀

9. How to Change Default Search Engine in New Edge Browser?
  •          Run the Edge browser and select the button with three dots.
  •          Then go to settings and choose ‘View Advanced Settings’.
  •          Now just Pick a search engine by using drop down menu ‘Search in the address bar with’.

10. How to Disable automatic restarts in Windows 10?
  •          Go to Settings and jump to “Update & Security”.
  •          Then just click the Windows update option.
  •          The choose “Advanced Options” and select “Notify to schedule restart” from drop-down menu.

And we got you a list of some usable Windows 10 Shortcut keys.

WIN + I – [Open Settings app]
WIN + S – [Search Windows]
WIN + C – [Voice Search Windows]
WIN + D – [Reveals Desktop]
WIN + G [Game Bar]
WIN + X [Start button context menu]
WIN + K – [Connect Wireless devices]
WIN + H – [Share content]
WIN + A – [Open the Action Center]
WIN + L – [Lock]
WIN + SPACE – [Change input language]
WIN + Ctrl-Left or Right [Virtual desktop]
WIN + Ctrl + D [Virtual desktop]
WIN + Ctrl +C [Cortana listening]
WIN + Ctrl + F4 [Closes the virtual desktop]

Hack AppLock in Android

How to Hack AppLock in Android             

     AppLock is one of the android security apps used by most of the android users. AppLock helps us to lock photos, messages, contacts, apps etc., and protects our privacy. However, AppLock will not give 100% security to the apps. In this article, I’ll explain How to hack AppLock android app. No need to uninstall the app or no root is required. well! let us see how to bypass AppLock android app without knowing the password.

Note: This trick will not work if the settings are locked by the admin.
1. Take the target phone in which you want to hack AppLock.
2. Now go to settings and then tap on Apps or Applications.
3. You will see AppLock app under downloaded section and tap on it.
4. After that tap on Force stop option.
With this AppLock application is currently in the idle state. You can open locked apps without entering the password.
I hope you’ve have understood How to bypass AppLock application in android devices. If you have any doubts, comment below in the comment section and share this trick with friends and others.

Monday, May 2, 2016

Tips to increase mobile battery life

Usefull tips to increase mobile battery life

       Looking for some tips to increase mobile battery life? Check it down below,

         Mobile phones are widely used in our daily life just like our besties. We use those gadgets for getting connected with others quickly to share our thoughts and much more! And nowadays, smartphone manufactures are planning to work with their battery backup! Yeah, as everyone knows the smartphones don’t give long stand if the usage is more. For example, if you are surfing the internet or playing then your battery will be drained soon! And if its happens so, the life of battery too get decreased.

If you are looking for some best tips to boost your battery life without spending any bucks for charging it then you have reached the right page. In order to increase your battery life, here I got you some exclusive tips. Just follow these below tips which will surely increase the battery life of your smartphone. Let’s read it.

Best tips to increase mobile battery life

  •  Connectivity: Without any necessary purpose, turn off your connectivity services. It includes your Data connection, Bluetooth, and Wi-Fi too. Among those things, both 4G and 3G consumes much power. So trun off at a time of not in uese. It will surely save your battery for the long stand.


  • Turn Off Location Service: Some latest smartphone got this feature which allows you to send the users location for GPS and another purpose. This is a good specs, but it will consume lots of your battery power. So try to turn it off, when you don’t need to location services.


  • Minimizing the usage: I know you are a big nerd, so you will use your device for a long time! Anyhow just try to minimize the use whenever the specific application is not required. You can just uninstall it instead for simple installed on your device. It will occupy your onboard space along it will drain your battery power too! So try to minimize and uninstall such apps from your smartphone.


  • Low Brightness: By decreasing the level of brightness, the smartphone consumes less power than it’s in full brightness. To increase your battery life just change your default brightness level into minimum or low as you can.


  • Using 3rd Party Apps: For increasing your battery life you can install some third party battery apps which will notify you the excat consuming the power of your battery. It is better to you Battery Doctor which is one of the best Application for Increase the Battery Life. And this app is compatible for all major mobile platforms like Android and iOS. The best thing with this app, Battery Doctor will be notifying you with exact current and the left power level!.


Recover Lost Data on Android

Tips To Recover Lost Data on Android (Rooted or Unrooted)
             It’s not new thing , We’ve all done it  deleted files, photos or videos by accident. No need to be worried, though. There are ways to recover your data whether you’re rooted or not. Time is always of the essence though: do not save anything else to your device or switch it off until you attempt recovery. Turn off your Wi-Fi and 3G/4G connection so that no automatic updates occur and overwrite anything before you’ve had a chance to recover lost data on Android.

Working Tricks to recover Android lost data (OT ROOTED)

“If you haven't heard what is "Rooted" that means you might not have rooted”

Once you’ve checked the obvious – such as looking in the Trash of your photos app, which stores files you’ve deleted from your gallery until it’s emptied – the next step is to connect your phone to a PC and run a file recovery app. However, there’s one little problem with that: post-Ice Cream Sandwich versions of Android ditched the Mass Storage Protocol that made your internal storage look like a flash drive, so many tried and tested recovery methods won’t work any more. Don’t worry, though, because we’ve got a solution to that too.

If the file(s) you’re looking for were on your memory card, you can use a Micro SD Card Adapter to attach your microSD via USB. Then download Recuva (you can use either the paid or free version), which is a program to recover files. You can also use other programs, such as Coolmuster or Wondershare Dr. Fone (which requires root but is available for Mac or PC), but Recuva is a great free tool.

Note: Normally, for most of these programs to work, your memory must be formatted as FAT32, NTFS or similar. If  format is not recognized for some reason, you can just do a complete copy of its contents to your computer, reformat the memory card as FAT32 and then dump the copied files back on it and continue the process.

When you run Recuva, the first thing to do is select the type of file you want to recover: Pictures, Videos, Music, Documents, etc. The option to restore from a specific location is available and you can even set a specific folder to attempt recovery from. Note that Recuva will only display locations it can actually recover data from. Just follow the prompts in the program.

Important: When you finish recovering your deleted files, it’s highly advisable to save them on a different device to the one on which they were originally lost: this can sometimes cause conflicts and hinder recovery. So if you are recovering files from your smartphone, record them on the hard disk of the PC and then transfer them over later, once they’re safe and sound.
If the file(s) were on your internal storage, don’t worry: we can fix that too. If you haven’t already enabled the developer options in Android, go to Settings > About Phone > Build Number (or your phone’s equivalent; for example, on a Galaxy S5 it’s Settings > About device > Build Number) and then tap the build number section seven times. Once you’ve done that, go into Settings > Developer Options and enable USB debugging. You should now be able to use an app such as Wondershare Dr Fone to scan your device.

Tips to Recover lost data on Android (If you have ROOT access to your android device)

Ø  First of all Download Undelete.
Ø  The application is very simple. The first thing to do is to select the storage device from which you want to retrieve your data (can be internal or external memory).
Ø  Then you scan the selected device.
Ø  The process may take between two and 10 minutes, depending on your memory size and the amount of stored data.
Ø  When finished you will be presented with retrievable data in several tabs: Files, Pictures, Music, Videos, Documents and Files. Recovered data returns to its place of origin, ie wherever it was saved before they were lost.

Ø  This option may only work partially (if there is a problem with your memory). In that case, proceed to the Recuva steps above, or use Wondershare or another root recovery program.